
Cake pops have taken the dessert world by storm—and for good reason. These bite-sized delights combine the indulgence of cake with the portability of a lollipop, making them a hit at birthdays, baby showers, weddings, or even your average weekend coffee break. In this article, we’re focusing on one of the most charming varieties out there: Pink Vanilla Cake Pops. Not only are they beautiful to look at, but they’re also incredibly easy to make and customize. Whether you’re a beginner baker or just looking for a quick yet stunning dessert option, this guide has you covered.
Why Pink Vanilla Cake Pops Are a Must-Try
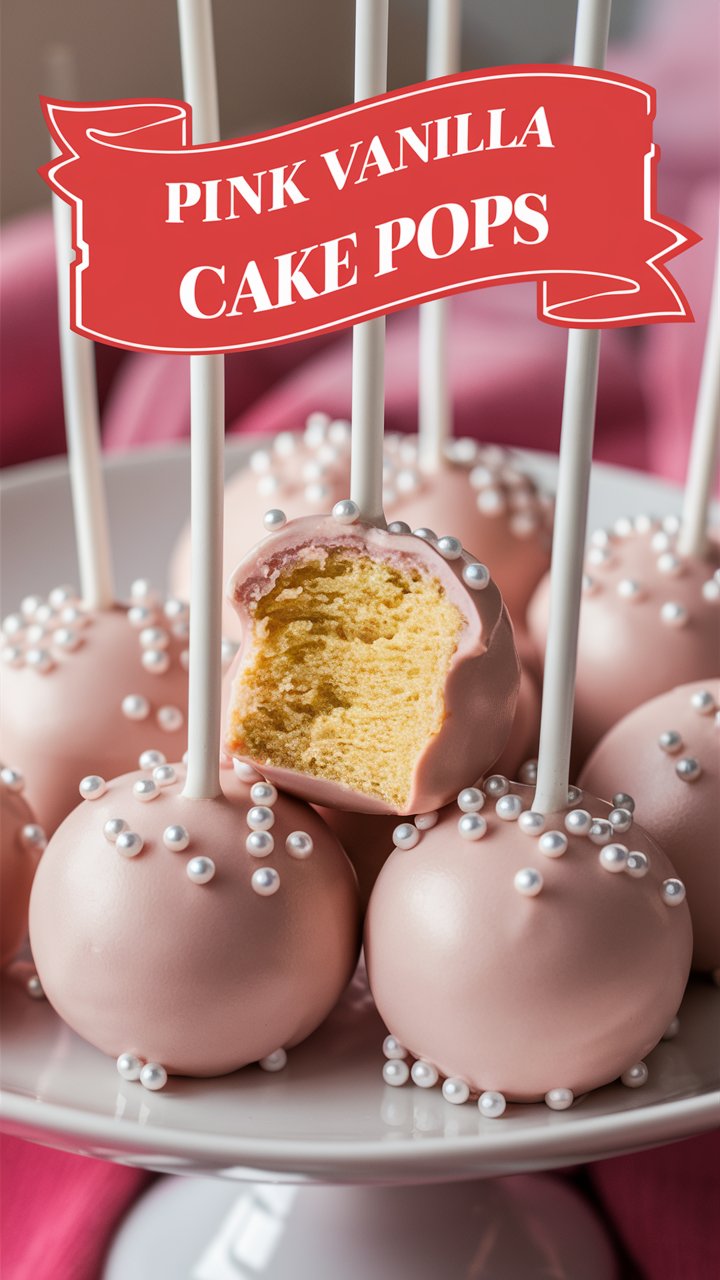
- Aesthetic Appeal Pink vanilla cake pops bring a vibrant charm to any dessert table. Their glossy candy coating and whimsical sprinkles make them look like something straight out of a boutique bakery.
- Kid-Friendly Fun This recipe is simple enough to involve kids. From rolling the cake into balls to adding the final sprinkles, there’s plenty of room for little hands to help.
- No Special Equipment Needed You don’t need a fancy cake pop maker or even cake pop molds. Just a few household items and you’re ready to roll.
- Perfect for Gifting Wrapped in cellophane with a cute ribbon, these cake pops make for adorable party favors or homemade gifts.
- Time-Saving Option Using boxed cake mix and ready-made frosting keeps prep time to a minimum without sacrificing flavor or texture.
Ingredients You’ll Need
To make around 24 cake pops, gather the following:
- 1 box of classic vanilla cake mix (plus ingredients required on the box: usually eggs, oil, and water)
- 1/4 cup vanilla frosting (store-bought or homemade)
- 12 oz pink candy melts (or any color you prefer)
- White sprinkles (or other decorations of your choice)
- Cake pop sticks
- Parchment paper
- Styrofoam block or cake pop stand (for drying)
Step-by-Step Instructions
1. Bake the Cake
Follow the instructions on your cake mix box. Once baked, allow the cake to cool completely. This is essential—warm cake can ruin the consistency needed for shaping.
2. Crumble the Cake
Break the cake into fine crumbs using clean hands or a food processor. The finer the crumbs, the smoother your cake pop texture will be.
3. Add the Frosting
Mix in 1/4 cup of vanilla frosting. Blend thoroughly until the mixture holds together when pressed. You want it moist enough to shape but not overly sticky.
4. Shape the Cake Balls
Use a cookie scoop or spoon to portion out the mixture. Roll each portion into a smooth ball using your hands. Place them on a baking sheet lined with parchment paper.
5. Chill the Cake Balls
Place the rolled cake balls in the freezer for 15-20 minutes. This helps firm them up, making dipping easier and more successful.
6. Melt the Candy Coating
Melt the pink candy melts according to package directions. You can use a microwave or a double boiler. Stir frequently to avoid clumps.
7. Insert the Sticks
Dip the tip of each cake pop stick into the melted candy, then insert it about halfway into a chilled cake ball. This helps anchor the stick in place.
8. Dip and Decorate
Fully dip the cake pop into the melted candy coating. Tap gently to let excess coating drip off. Before the coating sets, sprinkle on your decorations.
9. Set the Cake Pops
Stick the finished cake pops upright into a Styrofoam block or cake pop stand to dry completely. This usually takes about 15-30 minutes at room temperature.
Tips for Success
- Use room-temperature frosting for easier blending.
- Do not skip chilling the cake balls; they’re more likely to fall off the stick if they’re too soft.
- If the coating is too thick, add a teaspoon of vegetable shortening to thin it out.
- Use a deep but narrow cup for dipping to get an even coat.
- Want extra sparkle? Add edible glitter for a touch of glam.
Variations to Try
Flavor Variations:
- Chocolate Cake + Strawberry Frosting
- Lemon Cake + Cream Cheese Frosting
- Red Velvet Cake + Vanilla Frosting
- Strawberry Cake + White Chocolate Frosting
Coating & Decoration Ideas:
- Use blue, green, or purple candy melts for different themes.
- Swap white sprinkles for rainbow confetti or heart-shaped candies.
- Drizzle with contrasting colored candy melts for a two-tone effect.
- Dip in crushed nuts or coconut for texture.
Occasions to Serve Pink Vanilla Cake Pops
- Birthday Parties: Kid-friendly and visually appealing
- Baby Showers: Gender reveal twist with blue or pink coatings
- Valentine’s Day: Heart sprinkles and red ribbons make them perfect
- Weddings: Elegant when decorated with gold or silver dust
- Seasonal Events: Customize colors to match the season
Storing and Transporting Tips
- Storage: Keep in an airtight container at room temperature for up to 3 days, or refrigerate for up to a week.
- Freezing: Cake pops (without coating) can be frozen up to 1 month. Thaw before dipping.
- Transport: Use a cake pop carrier or arrange tightly in a container with padding to avoid shifting.
Common Mistakes to Avoid
- Over-mixing frosting: Makes the cake balls too soft to hold their shape.
- Skipping the chill step: Leads to cake balls falling apart during dipping.
- Thick coating: Makes the candy shell too heavy. Thin it with a bit of shortening.
- Wrong stick insertion: Don’t push too far, or the ball may crack.
- Not tapping off excess coating: Causes puddling when drying.
Nutrition Breakdown (Per Cake Pop)
Note: These values are approximate and depend on brand and ingredients used.
- Calories: 375
- Fat: 18g
- Sugar: 29g
- Carbohydrates: 45g
- Protein: 2g
- Contains: Wheat, dairy, egg (depending on cake mix and frosting)
Final Thoughts
Pink vanilla cake pops are more than just a dessert—they’re a fun, creative activity that brings smiles to any gathering. With their soft cake interiors and eye-catching candy coating, they offer a perfect balance of flavor, texture, and visual appeal. Whether you’re baking for a party or just treating yourself to something special, this recipe is sure to become a favorite in your kitchen.