
Nutella Banana Sushi is more than just a snack—it’s a little bite of happiness that combines creamy hazelnut spread, fresh bananas, and soft tortillas into a treat that’s playful, quick, and universally loved. Whether you’re a busy parent looking for an after-school surprise, a student craving a no-cook snack, or someone who simply loves experimenting in the kitchen, this recipe will never disappoint.
In this ultimate guide, we’ll cover everything you need to know: from ingredients and step-by-step preparation to creative variations, serving suggestions, storage tips, and even nutritional tweaks. By the end, you’ll be able to master not just one, but multiple versions of this sweet and satisfying snack.
Why Nutella Banana Sushi is So Popular
There are countless snack ideas online, but few are as fun, simple, and versatile as Nutella Banana Sushi. Here’s why it has become a household favorite:
- No-Cook Convenience: Ready in just 10 minutes.
- Kid-Friendly: Children love the fun sushi-style presentation.
- Customizable: Add fruits, nuts, coconut, or even a drizzle of chocolate.
- Portable Snack: Perfect for lunchboxes, picnics, or parties.
- Balance of Flavors: The creamy chocolate-hazelnut spread blends beautifully with ripe bananas.
In other words, it’s not just food—it’s an experience!
Ingredients You’ll Need
To make this delicious treat, you only need a handful of basic ingredients.
Core Ingredients:
- Large Tortillas – soft flour or whole wheat work best.
- Nutella – the star of the recipe; creamy and chocolatey.
- Ripe Bananas – firm but sweet bananas are ideal.
Optional Add-Ins:
- Crushed Nuts (walnuts, almonds, peanuts, or pistachios).
- Shredded Coconut – for a tropical touch.
- Fresh Berries – strawberries, raspberries, or blueberries.
- Granola – adds crunch and fiber.
- Peanut Butter or Almond Butter – for a nutty flavor boost.
(Pro Tip: Use the freshest ingredients possible. A slightly overripe banana may be too mushy, while an underripe one might lack sweetness.)
Step-by-Step Instructions
Making Nutella Banana Sushi is fun and surprisingly easy. Here’s a foolproof method:
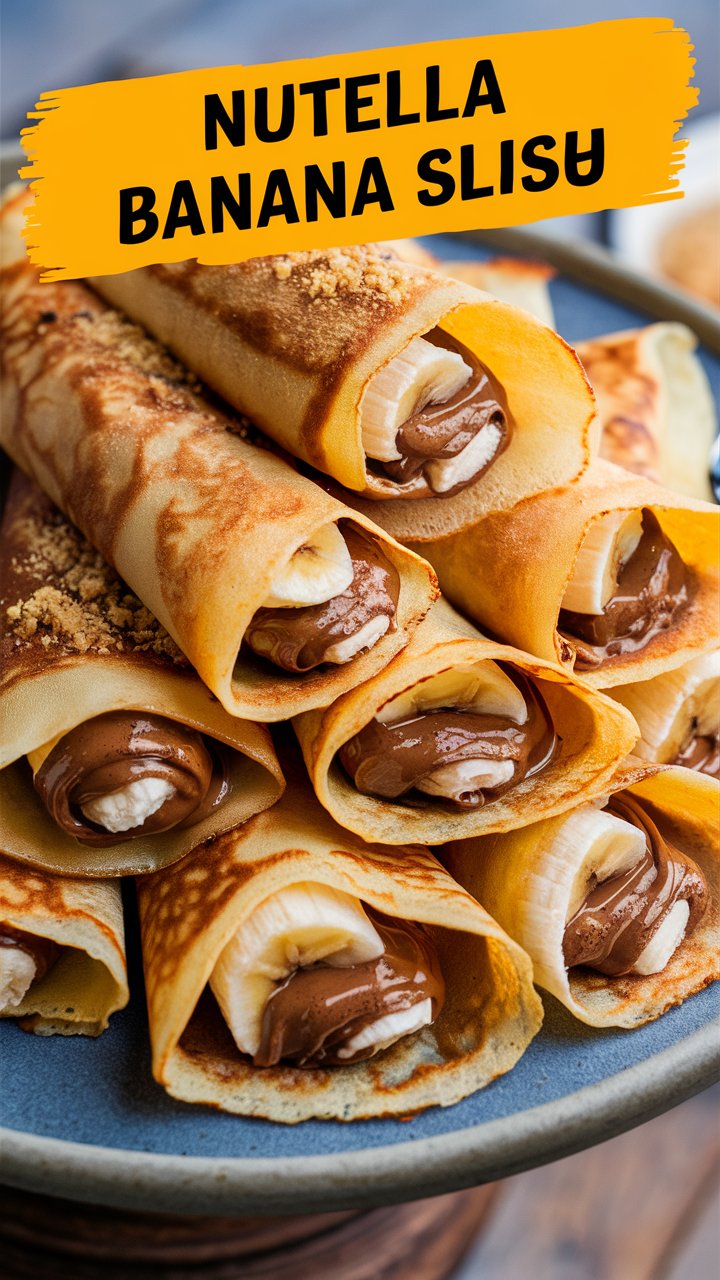
Step 1: Spread the Nutella
Lay one tortilla flat on a clean surface. Using a butter knife or spatula, spread a generous layer of Nutella evenly across the tortilla.
Step 2: Add the Banana
Place one peeled banana at the edge of the tortilla. Position it so it runs lengthwise along the tortilla.
Step 3: Roll It Up
Gently roll the tortilla around the banana, starting at the edge where the banana sits. Roll tightly but carefully, ensuring the filling doesn’t squish out.
Step 4: Optional Coating
For extra flavor and texture, roll the tortilla in crushed nuts, shredded coconut, or even granola. This adds a crunchy outer layer.
Step 5: Slice Into Sushi Pieces
Use a sharp knife to slice the roll into 1-inch pieces. Arrange them neatly on a serving plate for a sushi-like appearance.
Step 6: Serve & Enjoy
Eat immediately for the best texture, or refrigerate for up to 24 hours.
Tips for Perfect Results
- Don’t Overfill: Too much Nutella or add-ins can make rolling difficult.
- Use a Sharp Knife: A dull knife will squish the roll instead of slicing cleanly.
- Chill Before Cutting: Refrigerating for 10–15 minutes helps firm up the roll, making it easier to slice.
- Experiment with Tortillas: Spinach or tomato tortillas can add color and variety.
- Make It Ahead: Prepare in the morning, refrigerate, and slice before serving.
Fun Variations of Nutella Banana Sushi
One of the best things about this recipe is its adaptability. Here are some exciting twists:
1. Berry Explosion
Add sliced strawberries, raspberries, or blueberries inside the roll before cutting. The tartness balances the sweetness perfectly.
2. Peanut Butter Power
Spread a thin layer of peanut butter underneath the Nutella. The nutty richness takes this sushi to another level.
3. Nut-Free Delight
For allergy-friendly versions, replace Nutella with sunflower seed butter or a nut-free chocolate spread.
4. Granola Crunch
Sprinkle granola inside before rolling to add crunch and fiber.
5. Chocolate Drizzle
Once sliced, drizzle melted dark chocolate over the sushi bites for a gourmet touch.
Serving Suggestions
- As a Snack: Serve with a glass of milk or hot cocoa.
- At Parties: Arrange on a platter with colorful fruit for a fun centerpiece.
- For Breakfast: Pair with Greek yogurt and berries for a quick morning meal.
- In Lunchboxes: Wrap tightly in cling film and add to kids’ school lunches.
- For Dessert: Serve with a scoop of vanilla ice cream.
Nutritional Insights
While Nutella Banana Sushi is more of a treat than a health food, you can make it lighter:
- Use whole-grain tortillas for added fiber.
- Replace Nutella with dark chocolate spread for lower sugar.
- Add chia seeds or flax seeds for omega-3s.
- Keep portion sizes small for a guilt-free indulgence.
Estimated Nutrition (per roll):
- Calories: ~300
- Carbs: 40g
- Protein: 5g
- Fat: 15g
Storage & Make-Ahead Tips
- Refrigeration: Store in an airtight container for up to 24 hours.
- Lunchbox Friendly: Wrap rolls before slicing and cut just before eating.
- Freezing: Not recommended, as bananas may become mushy.
FAQs About Nutella Banana Sushi
1. Can I use other fruits?
Yes! Strawberries, apples, peaches, or pears work well. Just slice them thin.
2. Is it gluten-free?
Use gluten-free tortillas and you’re good to go.
3. Can I make it vegan?
Yes. Choose vegan tortillas and dairy-free hazelnut spread.
4. Is this suitable for toddlers?
Yes, but slice into very small pieces and avoid nuts if choking is a concern.
5. Can I prepare it for a party ahead of time?
Yes, but slice right before serving to keep the presentation fresh.
Creative Occasions to Serve This Recipe
- 🎉 Birthday Parties – Fun finger food for kids and adults.
- 🥪 Picnics – Easy to pack and share outdoors.
- 🎃 Halloween Treats – Roll in orange sprinkles for a spooky twist.
- 💕 Valentine’s Day – Drizzle with strawberry syrup and serve with heart-shaped fruit.
- 🏫 School Snacks – A healthier alternative to store-bought sweets.
Final Thoughts
Nutella Banana Sushi isn’t just a snack—it’s a fun, versatile, and creative recipe that transforms simple ingredients into something special. It’s proof that delicious food doesn’t have to be complicated or time-consuming.
Whether you’re preparing a quick bite for yourself, making something exciting for kids, or looking to impress guests with a playful dessert, this recipe is a winner every time.