
Making homemade gluten-free bread used to feel impossible — dense centers, crumbly slices, and loaves that never rose the way you hoped. But modern gluten-free baking has come a long way. With the right ingredients, reliable techniques, and a little understanding of how gluten-free dough behaves, anyone can create a loaf that’s beautifully risen, golden on the outside, and soft on the inside.
Whether you’re gluten-sensitive, cooking for someone with celiac disease, or simply exploring healthier homemade options, this master guide will walk you through every step. You’ll learn how gluten-free bread works, how to select the right flours, how to troubleshoot common issues, and finally how to make a foolproof, delicious loaf — even if you’re a total beginner.
Why Gluten-Free Bread Matters Today
Gluten-free living has expanded far beyond a niche dietary restriction. Millions of people now bake gluten-free bread because:
- They have gluten intolerance.
- A family member has celiac disease.
- They feel better without wheat-based products.
- They prefer homemade bread to store-bought preservative-heavy loaves.
- They want healthier, customizable ingredients.
Yet, despite the demand, store-bought gluten-free bread often disappoints:
- It’s expensive.
- It spoils quickly.
- It can be dry, crumbly, or overly gummy.
Homemade gluten-free bread solves all of these issues — and learning to make it is easier than ever.
Understanding Gluten-Free Bread
To bake excellent gluten-free bread, you need to understand why it behaves differently from traditional wheat-based loaves.
What Gluten Does — and Why You Must Replace It
In traditional bread, gluten acts like a stretchy net:
- It traps air bubbles.
- Gives bread its elasticity.
- Helps the loaf rise tall.
- Creates a chewy, structured crumb.
Without gluten, dough behaves more like thick cake batter.
This means gluten-free bread must rely on:
- Starches for structure
- Binders for elasticity
- Hydration for rise
- Fermentation for flavor
Once you understand these elements, your bread will turn out consistently perfect.
Choosing the Right Gluten-Free Flour Blend
A successful gluten-free loaf begins with a well-balanced flour mixture. Not all blends work for bread, and choosing the wrong one is often the number one reason loaves fail.
Types of Flours You Should Use
A great gluten-free bread blend usually includes:
1. Whole Grain Flours for Depth
- Brown rice flour
- Sorghum flour
- Millet flour
- Quinoa flour
- Buckwheat flour
These add flavor, color, and essential nutrients.
2. Starches for Lightness
- Tapioca starch
- Potato starch
- Cornstarch
- Arrowroot starch
Starches create softness, fluffiness, and a good rise.
3. Protein-Rich Additions
- Almond flour
- Chickpea flour
- Teff flour
These help simulate gluten’s structure.
Pre-Made Gluten-Free Bread Blends (Pros & Cons)
Many brands sell gluten-free blends labeled specifically for bread. These can be useful because:
- They contain pre-balanced ratios.
- They behave consistently.
- They save time and guesswork.
But:
- They can be expensive.
- Some include gums you may not want.
- Flavor varies across brands.
For beginners, pre-made blends work well.
For advanced bakers, homemade blends offer full control.
Binders: The Secret to Gluten-Free Success
Flour alone cannot mimic gluten. You must add a binder that gives moisture retention, elasticity, and structure.
Popular Gluten-Free Binders
- Xanthan gum
- Adds stretch and structure
- Common in bread recipes
- Psyllium husk powder
- Creates a flexible, strong dough
- Offers fiber and moisture retention
- Produces a more “wheat-like” texture
- Guar gum
- Acts similarly to xanthan
- Works well when paired with starches
- Ground flaxseed or chia seed gel
- Used for natural/clean baking
- Helps retain moisture
If your flour blend already has a gum, do NOT add more.
Hydration: The Most Important Part of Gluten-Free Baking
Gluten-free bread dough is much wetter than traditional dough.
It should resemble:
- Thick batter
- Sticky paste
- Soft dough that cannot be kneaded normally
High hydration allows starches to swell, giving your bread:
- Better air pockets
- Taller rise
- Softer crumb
- Longer freshness
If your dough feels firm or dry, the bread will turn out dense.
Fermentation: The Science Behind a Great Loaf
Fermenting gluten-free dough helps compensate for the lack of gluten. It also improves:
- Texture
- Flavor
- Aroma
- Digestibility
Two types of fermentation methods work especially well:
1. Rapid Fermentation
Used for quick gluten-free bread.
Rise time: 45–90 minutes.
2. Slow Fermentation (Recommended)
Used for no-knead gluten-free bread.
Rise time: 12–18 hours.
Slow fermentation dramatically enhances:
- Airiness
- Flavor complexity
- Moisture retention
This is the method we focus on in this guide.
Essential Ingredients for Gluten-Free Bread
Before baking, gather these core ingredients:
| Ingredient | Purpose |
|---|---|
| GF flour blend | Main structure |
| Yeast | Leavening, flavor |
| Warm water | Hydrates starches |
| Salt | Strengthens dough, enhances taste |
| Binder | Elasticity & crumb integrity |
| Optional add-ins | Flavor & texture |
Optional ingredients such as honey, herbs, seeds, or olive oil can elevate your loaf even further.
The Ultimate No-Knead Gluten-Free Bread Recipe
This is a refined, improved, deeply-tested gluten-free bread recipe designed to produce a beautiful loaf every time.
Ingredients
- 3 cups gluten-free flour blend (bread-specific preferred)
- 1 teaspoon active dry yeast
- 1 ½ teaspoons fine salt
- 1 ½ cups warm water (110°F / 43°C)
- 1 tablespoon olive oil (optional)
- Optional flavor boosters:
- Herbs
- Seeds
- Honey
- Garlic powder
- Cheese
Step-by-Step Instructions
1. Mix the Dry Ingredients
In a large bowl, whisk together the flour blend and salt.
If your blend has xanthan gum, do not add extra.
2. Activate the Yeast
In a small bowl:
- Add warm water
- Add yeast
- Let it sit 5–10 minutes
- Look for foam on top
Foam means your yeast is active.
3. Combine Everything
Pour the yeast mixture into the flour mixture.
Use a spatula to stir until a sticky dough forms.
4. Slow Fermentation
Cover the bowl with plastic wrap or a damp towel.
Let it rest:
- 12–18 hours
- At room temperature
- Away from drafts or direct sunlight
The dough will double in size and look bubbly.
5. Preheat Your Oven & Dutch Oven
Preheat to 450°F (232°C).
Place a Dutch oven inside to heat for at least 30 minutes.
6. Shape the Dough
Transfer the dough onto parchment paper.
Wet your hands to prevent sticking.
Shape gently into a round or oval loaf.
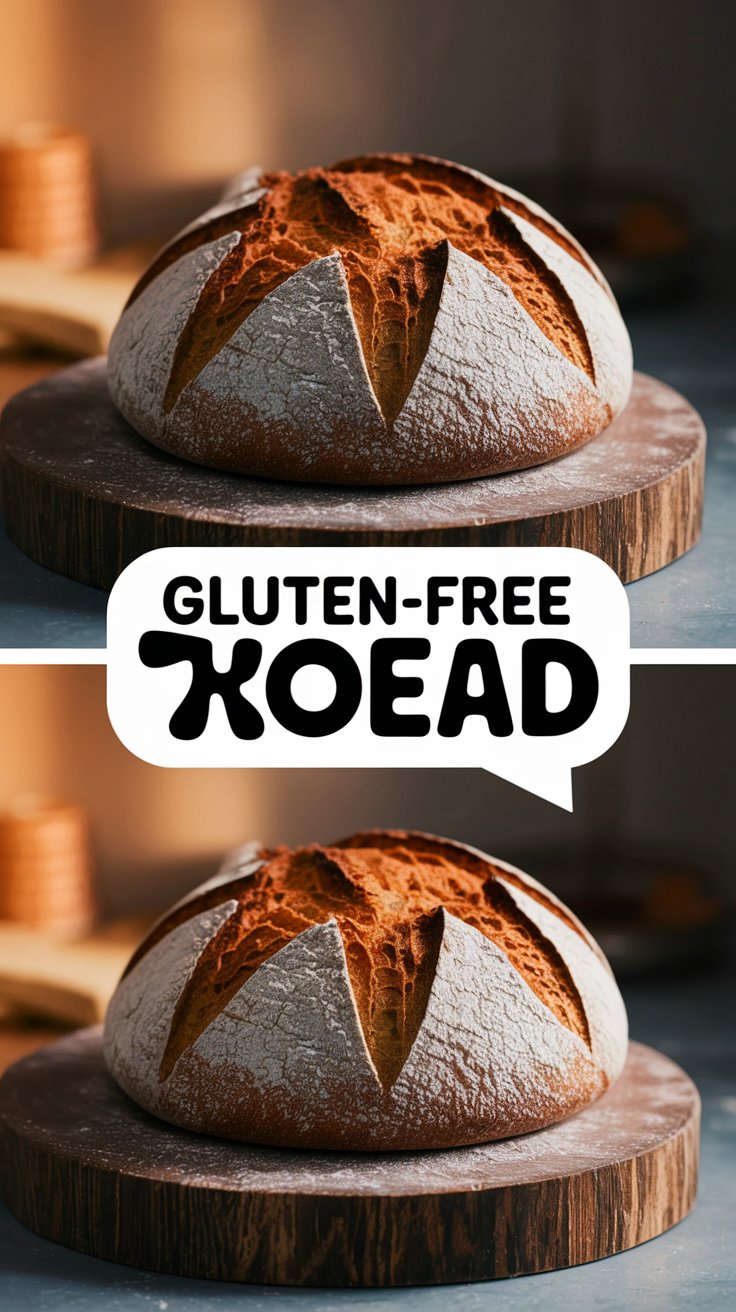
7. Bake
Carefully place the dough (with parchment) into the hot Dutch oven.
- Bake 30 minutes covered
- Then bake 15–20 minutes uncovered
The loaf should be golden brown with a crisp shell.
8. Cool Completely
Let the bread cool 1 hour before slicing.
Cutting early leads to a gummy interior.
Variations to Customize Your Loaf
1. Herb & Garlic Loaf
Add:
- 1 tablespoon dried herbs
- ½ teaspoon garlic powder
2. Seeded Crunch Loaf
Add:
- ¼ cup sunflower seeds
- 1 tablespoon sesame
- 1 tablespoon chia
3. Slightly Sweet Breakfast Loaf
Add:
- 1 tablespoon honey
- 1 tablespoon olive oil
- A pinch of cinnamon
4. Cheesy Mediterranean Loaf
Add:
- ⅓ cup shredded Parmesan
- 2 tablespoons chopped olives
5. High-Fiber Whole Grain Loaf
Replace:
- 1 cup flour blend with sorghum or buckwheat
Common Problems & How to Fix Them
1. Dense Loaf
Likely causes:
- Not enough hydration
- Not enough fermentation time
- Dough too cold
Fix:
- Add more water
- Ferment the full 12–18 hours
- Move bowl to a warmer room
2. Gummy Interior
Causes:
- Underbaked center
- Loaf sliced too soon
- Too much water
Fix:
- Bake 5–10 more minutes uncovered
- Let cool fully
- Reduce water slightly next bake
3. Cracked or Hard Crust
Causes:
- No steam during baking
- Oven too hot
- Bread baked too long uncovered
Fix:
- Use a Dutch oven
- Bake covered first
- Tent with foil near the end
4. Bread Didn’t Rise
Causes:
- Old yeast
- Water too hot or cold
- Room too cold
Fix:
- Use fresh yeast
- Warm the room
- Add ¼ teaspoon sugar
How to Store Gluten-Free Bread Correctly
Room Temperature
- Store in airtight container
- Stays fresh 2–3 days
Freezing
Slice fully, freeze individually, then store in freezer-safe bags for up to 3 months.
Reheating
- Toast slices
- Or bake at 350°F for 5–7 minutes
Serving Ideas for Every Meal
Breakfast
- Avocado toast
- Almond butter + banana
- Jam + butter
- Gluten-free French toast
Lunch
- Grilled cheese
- Turkey & hummus sandwich
- Tuna melt
- Veggie-loaded open-faced toast
Dinner
- Side with soups
- Charcuterie boards
- Homemade garlic bread
- Dips & spreads
Frequently Asked Questions
Q: Is gluten-free bread healthier?
It can be — depending on ingredients. Homemade versions often avoid preservatives and allow whole grains.
Q: Can I make this recipe vegan?
Yes. The base recipe contains no eggs or dairy.
Q: Can this be made in a loaf pan?
Yes. Add ¼ cup more water, pour into a greased pan, and bake uncovered.
Q: Why is gluten-free dough so sticky?
Because gluten-free flours require more water. Sticky is good — dry dough creates dense bread.