
Looking for a fun, fast, and festive Easter craft you can enjoy with kids, friends, or even solo? Say hello to your new favorite Easter project: Mini Egg-Filled Mason Jars complete with adorable printable labels! Whether you’re prepping party favors, Easter baskets, or gifts for teachers and neighbors, this guide covers everything from supplies to step-by-step instructions—all AdSense-friendly, family-safe, and 100% original.
Why Choose This Easter Mason Jar Craft?
Creating Easter-themed mason jars is more than just a craft—it’s a wholesome, engaging activity for all ages. Here’s why you’ll love it:
1. Easy for All Ages
Even pre-schoolers can get involved! From pouring candies to placing the lids, it’s a hands-on activity that’s both safe and simple.
2. Budget-Friendly
You don’t need to splurge. These jars can be made using affordable, easy-to-find materials.
3. Perfect for Group Activities
Whether you’re organizing a classroom project, church event, or family gathering, this craft scales effortlessly.
4. Thoughtful Gifts
They make heartfelt, homemade gifts that look like you bought them from a boutique!
5. Reusable and Sustainable
Mason jars are eco-friendly and reusable. Swap the mini eggs for candles, bath salts, or fresh flowers after Easter!
Supplies You’ll Need
Make sure to gather the following materials before starting. You can easily customize depending on the colors or treats you prefer.
- Mason jars (small to medium size with lids)
- Mini eggs (or other pastel candies like jelly beans, M&Ms, etc.)
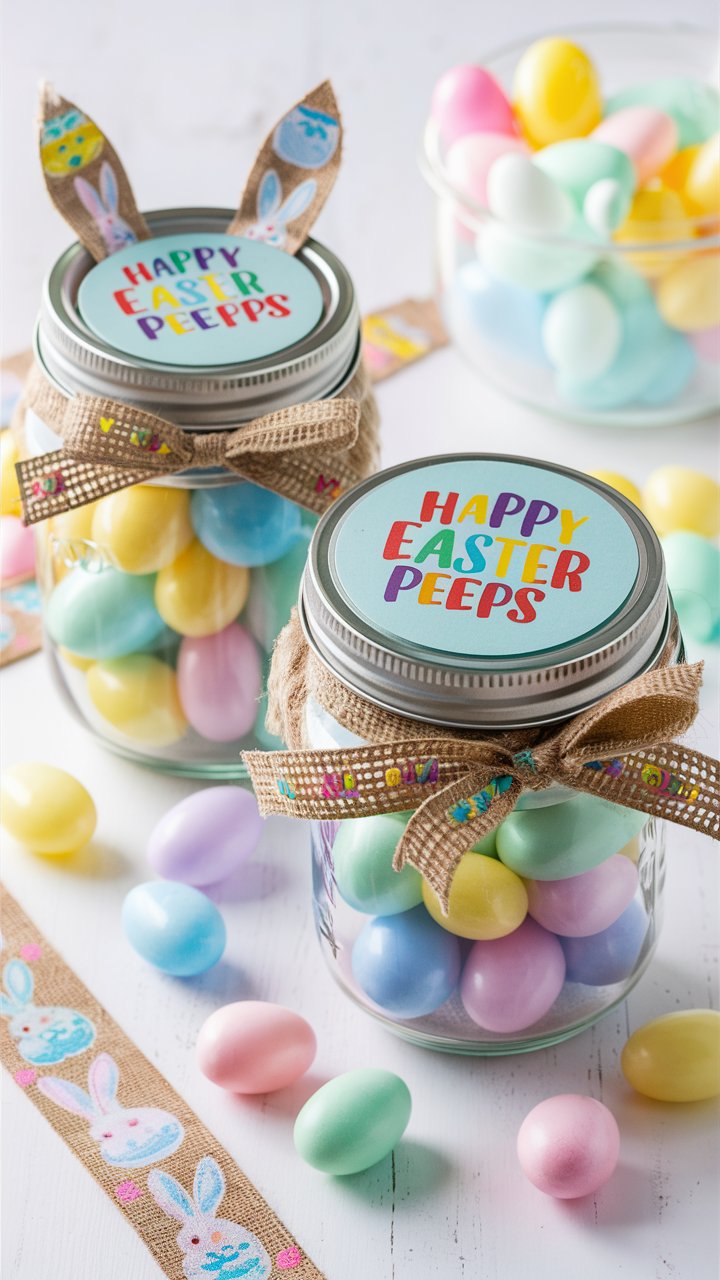
- Printable Easter labels (downloadable below)
- Scissors
- Ribbon or twine (for decorating the lid)
- Card stock or plain paper (for printing labels)
- Glue stick or double-sided tape (optional, for sticking labels to lids)
📝 Label Download Instructions
Our custom Easter label printables come in pastel tones and fit standard mason jar lids. Print them on cardstock for best durability.
Click below to download your free printable Easter labels:
[Download Easter Mason Jar Labels – PDF]
No account required. Print as many as you need!
Step-by-Step Instructions
These step-by-step directions ensure your jars come out cute, colorful, and consistent every time.
Step 1: Print and Cut the Labels
- Use any home printer.
- Choose white cardstock or sturdy paper.
- Cut the labels into circles or your desired shape using scissors.
Step 2: Fill the Mason Jars
- Pour in your mini eggs or candies of choice.
- Fill up to about 90% full, leaving a little space at the top.
Step 3: Attach the Labels
You have two options:
- Option A: Place the label on the flat lid piece, then screw on the ring.
- Option B: Use glue/tape to stick the label directly on the top or side of the jar.
Step 4: Tie a Decorative Ribbon
- Wrap a ribbon or string around the lid for a festive touch.
- Add a gift tag or small charm if desired.
Step 5: Gift & Enjoy!
- Place your jars in Easter baskets
- Distribute as gifts at school, church, or community events
- Use them as table decorations for your Easter brunch
Creative Variations for Your Jars
Want to put your own spin on this project? Try one of these delightful twists:
1. Themed Candy Fills
- Jelly beans in rainbow order
- Gummy bunnies
- Chocolate chicks or foil-wrapped eggs
2. Use Colored Mason Jars
- Light pink, blue, or green jars add extra flair!
- Or, spray-paint the lids for a custom color scheme.
3. Personalized Labels
- Add names to the labels for individual gifting.
- Write a sweet Easter message on the back.
4. Include a Message Scroll
Roll up a small note inside with a Bible verse, joke, or Easter riddle.
5. Add Faux Grass
Place a bit of green Easter grass inside the jar before adding candy.
Safety Tips for Kids
While this craft is designed to be child-friendly, safety always comes first:
- Supervise use of scissors with younger children.
- Be cautious with small candies around toddlers (choking hazard).
- Ensure lids are securely tightened to avoid spills.
Time & Skill Level
| Category | Detail |
|---|---|
| Estimated Time | 5-10 minutes per jar |
| Skill Level | Beginner (kid-friendly) |
| Cost per Jar | Low ($2–$4 depending on candy) |
| Best for | Kids, families, groups |
Storage Tips
- Keep filled jars in a cool, dry place.
- If you’re gifting them later, store them in a sealed box to avoid moisture damage.
- Don’t refrigerate, as this could cause candy to sweat or stick together.
FAQs About Easter Mason Jar Crafts
Q1: Can I use something other than mini eggs?
Absolutely! Jelly beans, candy-coated chocolate, even homemade treats like fudge or cookies work well.
Q2: Do I need sticker paper for the labels?
Nope! These labels work perfectly with regular printer paper or cardstock.
Q3: Where can I get affordable mason jars?
Try your local dollar store, craft store, or even order in bulk online for savings.
Q4: How far in advance can I make these?
You can prep these jars up to two weeks in advance if stored properly.
Q5: Can I reuse the jars next year?
Yes! Just remove the labels, wash the jars, and repurpose for another craft.
Ideas for Other Holidays Using This Tutorial
This craft idea works beyond Easter too! Just swap colors and labels.
- Valentine’s Day: Pink/Red candies, heart-shaped labels
- Christmas: Red/green treats with holly print labels
- Halloween: Orange/black jelly beans and spooky printables
- Thanksgiving: Fall-colored candy corn with grateful messages
Final Thoughts
This Easter Mason Jar Craft is a fun, budget-friendly, and meaningful activity that brings people together through creativity and kindness. Perfect for kids and adults alike, these jars double as decorations and thoughtful gifts.
Don’t forget to print your free labels, tie your ribbons tight, and share your creations with others. 🐣✨