
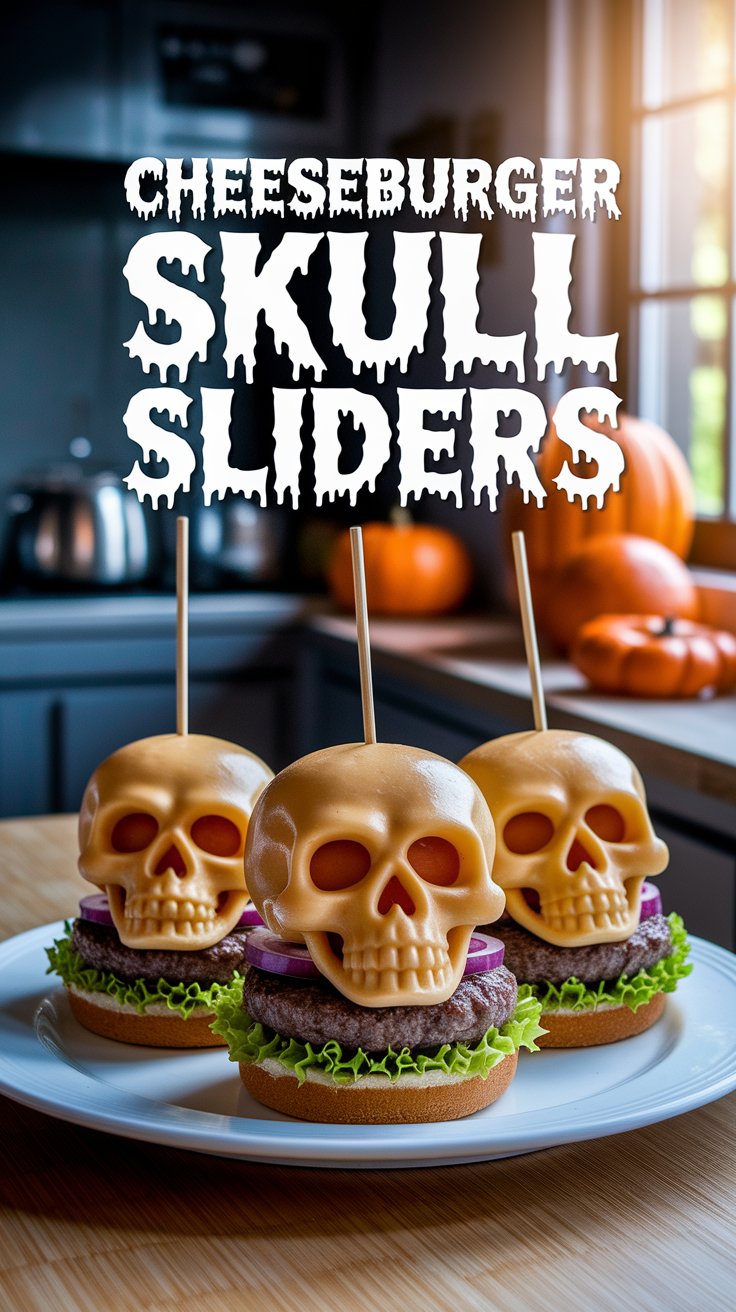
When Halloween rolls around, it’s not just about the costumes, candy, or haunted decor — it’s also about the food fun! If you’re looking for a spine-tingling recipe that’s as delicious as it is creative, these Cheeseburger Skull Sliders will be your showstopper. Imagine juicy, cheesy burgers shaped like spooky skulls, ready to thrill your guests and make your party unforgettable.
Whether you’re hosting a Halloween bash or simply want to surprise your family with a festive dinner, this recipe checks all the boxes: it’s easy, flavorful, kid-friendly, and seriously Instagram-worthy! 👻🍔
Let’s dive into how you can create these eerie yet adorable mini burgers that are guaranteed to impress!
🧠 Why You’ll Love Cheeseburger Skull Sliders
The beauty of these Cheeseburger Skull Sliders lies in their simplicity and creativity. They combine the comfort of a classic cheeseburger with a playful Halloween twist. Each slider is packed with seasoned ground beef, melty cheese, and a burst of flavor — all baked to golden perfection in a skull mold.
Here’s why everyone loves them:
- Quick and easy: Ready in about 35 minutes — perfect for busy weeknights or party prep.
- Customizable: You can fill, top, and spice them however you like.
- Kid-approved: Fun shapes make them a hit with little ones.
- Party-perfect: Ideal for Halloween buffets or themed dinners.
- Make-ahead friendly: Prepare patties in advance and bake just before serving.
These sliders aren’t just food — they’re a Halloween experience! 🎃
🧀 Ingredients You’ll Need
Before you start, gather everything in one place. Having your ingredients prepped will make the process smooth and enjoyable.
🛒 Basic Ingredients
- 1 lb lean ground beef – the main event!
- ½ cup shredded cheddar cheese – for that gooey, melty center.
- ¼ cup finely diced onions – adds a subtle sweetness.
- ¼ cup chopped pickles – a tangy balance to the rich beef.
- 1 teaspoon garlic powder – adds depth and aroma.
- 1 teaspoon salt
- ½ teaspoon black pepper
- 1 beaten egg – for brushing the tops before baking.
- 12 slider buns – soft, mini buns that fit perfectly under your skull patties.
- 1 tablespoon olive oil – for searing.
🧂 Optional Add-Ins
- Jalapeños for heat 🌶️
- Barbecue sauce for smoky flavor 🍖
- Fresh parsley for garnish 🌿
- Lettuce, tomato, or avocado for layering 🥬
You can adjust these according to your crowd’s taste — whether you’re feeding little goblins or spice-loving adults!
🔥 Step-by-Step Instructions: How to Make Cheeseburger Skull Sliders
🥣 Step 1: Preheat the Oven
Start by preheating your oven to 375°F (190°C). This ensures your sliders bake evenly and get that golden-brown perfection.
🍖 Step 2: Prepare the Meat Mixture
In a large mixing bowl, combine your ground beef, cheddar cheese, onions, pickles, garlic powder, salt, and pepper. Mix with your hands or a sturdy spoon until all ingredients are evenly incorporated — but don’t overmix, or your patties might turn tough.
👉 Pro Tip: For extra juicy sliders, add a teaspoon of Worcestershire sauce. It enhances flavor and helps retain moisture.
💀 Step 3: Shape the Skull Patties
Here comes the fun part!
Use a skull-shaped silicone mold (commonly used for Halloween baking) to shape your patties. If you don’t have one, form small oval patties by hand and slightly carve eye sockets using the back of a spoon for a similar spooky effect.
Each patty should be about ½ inch thick to ensure even cooking.
🍳 Step 4: Cook the Patties
Heat olive oil in a non-stick skillet over medium heat.
Sear each skull patty for about 3–4 minutes per side until browned. You don’t have to fully cook them here — they’ll finish in the oven. The sear locks in juices and gives a rich, beefy flavor.
Once done, place patties on a plate lined with paper towels to remove excess oil.
🍔 Step 5: Assemble the Sliders
Place the bottom halves of the slider buns on a baking sheet lined with parchment paper.
Top each bun with a cooked skull patty, add a bit more cheese if desired, and cover with the top bun.
Brush each bun lightly with the beaten egg. This step gives your sliders a golden, shiny finish.
🔥 Step 6: Bake to Perfection
Bake in your preheated oven for 10–12 minutes until the buns are beautifully golden and slightly crisp.
Let them cool for a few minutes — and voilà! Your Cheeseburger Skull Sliders are ready to haunt your dinner table!
🧛 Tips for Perfect Skull Sliders
Creating spooky food is fun, but these small details will make your sliders truly shine:
- Use lean beef (85% lean) to avoid excess grease while keeping moisture.
- Don’t overmix the meat — it makes patties dense.
- Brush with egg wash for glossy, bakery-style buns.
- Pre-sear patties to lock in flavor before baking.
- Get creative with toppings and sauces.
If you’re hosting a party, you can even label each slider flavor — “Spicy Skull,” “Cheesy Phantom,” or “BBQ Beast.” 🧟♂️
🍽️ Serving Suggestions
Presentation matters — especially on Halloween!
Here are some fun ways to serve your Cheeseburger Skull Sliders that’ll make your table look like a haunted feast:
- Serve on a black or orange platter with fake cobwebs for decoration.
- Pair with sweet potato fries for a color contrast.
- Add a side of bloody ketchup (tomato ketchup mixed with a bit of hot sauce).
- Offer green guacamole dip as “monster slime.”
- Stick tiny Halloween toothpicks or mini flags into each slider for a festive touch.
For drinks, spooky mocktails like “Witch’s Brew Punch” or “Pumpkin Cream Soda” complete the vibe. 🍹💀
🧁 Fun Variations to Try
Don’t limit yourself to one version — experiment and have fun!
🌶️ Spicy Skull Sliders
Add diced jalapeños or a pinch of chili flakes to the beef mixture for an extra kick.
🍄 Veggie Skull Sliders
Use a plant-based ground meat alternative and mix in finely chopped mushrooms, bell peppers, and spinach. Perfect for vegetarians.
🍔 BBQ Skull Sliders
Mix BBQ sauce directly into the beef mixture before shaping. It gives the patties a smoky-sweet twist.
🧄 Garlic-Lover’s Sliders
Add extra garlic powder or minced fresh garlic for a bold, savory punch.
🧀 Double-Cheese Skulls
Layer a slice of cheese on top of each cooked patty before assembling for maximum gooeyness!
🧤 Equipment You’ll Need
- Non-stick skillet or frying pan
- Mixing bowl
- Silicone skull mold (optional but fun!)
- Baking sheet lined with parchment paper
- Pastry brush for egg wash
- Spatula
If you don’t have a skull mold, don’t worry — hand shaping works perfectly fine, and you can still make the patties spooky with creative indentations!
💡 Make-Ahead and Storage Tips
⏰ Make-Ahead
You can prepare the patties a day ahead and refrigerate them in an airtight container. Simply cook and bake right before serving.
❄️ Freezing
Cooked sliders freeze beautifully! Wrap each slider tightly in plastic wrap, then place in a freezer bag. They’ll keep for up to 3 months.
🔁 Reheating
To reheat, bake at 350°F (175°C) for 8–10 minutes until warm. Avoid microwaving — it can make the buns soggy.
💬 Frequently Asked Questions (FAQs)
1. Can I make these without a skull mold?
Yes! You can shape patties by hand or use a cookie cutter to give a skull-like outline. The flavor stays the same — delicious and spooky.
2. What cheese works best?
Cheddar is classic, but you can use pepper jack, mozzarella, or American cheese for different flavors and textures.
3. Are they kid-friendly?
Absolutely! Kids love fun-shaped foods. Just skip the spicy ingredients if serving to little ones.
4. Can I use chicken or turkey instead of beef?
Yes — ground chicken or turkey works well. Just ensure you add a tablespoon of olive oil for moisture.
5. How do I make them gluten-free?
Use gluten-free slider buns and check your seasonings for gluten-free labeling. The rest of the ingredients are naturally gluten-free.
👩🍳 Hosting a Spooky Dinner? Here’s How to Complete the Menu!
Pair your Cheeseburger Skull Sliders with a full Halloween menu:
- Appetizer: Mummy Jalapeño Poppers
- Main Course: Cheeseburger Skull Sliders
- Side Dish: Ghostly Mashed Potatoes
- Dessert: Monster Eyeball Cupcakes
- Drink: Blood-Red Berry Punch
Set up your table with dim lighting, black napkins, and pumpkin centerpieces — and you’ll have an unforgettable Halloween dinner! 🕯️💀
🧁 Nutrition Facts (Per Slider)
- Calories: 250
- Protein: 12g
- Fat: 15g
- Carbohydrates: 20g
- Sugar: 2g
- Fiber: 1g
- Sodium: 400mg
Healthy tip: Serve with lettuce wraps instead of buns for a low-carb version. 🥬
✨ Pro Tips for a Party Success
- Make in batches: Double or triple the recipe for large gatherings.
- Add labeling cards: Kids love choosing between “Monster Melts” and “Zombie Bites.”
- Use themed serving trays: Small details elevate presentation.
- Involve kids in shaping: They’ll love creating skulls with you!
Hosting Halloween doesn’t have to be stressful — it can be a chance to laugh, create, and share joy through food.
💬 What Makes This Recipe Special?
These Cheeseburger Skull Sliders are not just about the spooky look — they’re a blend of creativity, family fun, and comfort food nostalgia. Each bite is juicy, cheesy, and seasoned perfectly. But what truly makes them special is the experience — cooking together, laughing at how “scary” they look, and enjoying them warm right out of the oven.
It’s these little moments that make holidays memorable. 🎃
🧡 Final Thoughts: Bringing Joy with Every Bite
Cooking isn’t just about feeding people — it’s about sharing love, laughter, and creativity. These Cheeseburger Skull Sliders turn an ordinary meal into a celebration. Whether you’re a seasoned cook or just getting started, you’ll find this recipe simple, fun, and satisfying.